Replace the ink cartridges
Follow these instructions when the ink level is low.
NOTE: When the ink level for an ink cartridge is low, a message appears on the
display. You can also check the ink levels by using the printer Toolbox (Windows) or
the HP Utility (Mac OS X).
NOTE: Ink from the cartridges is used in the printing process in a number of different
ways, including in the initialization process, which prepares the device and cartridges
for printing. In addition, some residual ink is left in the cartridge after it is used. For
more information see
www.hp.com/go/inkusage
.
Ink level warnings and indicators provide estimates for planning purposes only. When
you receive a low-ink warning message, consider having a replacement cartridge
Chapter 6
62
Work with ink cartridges
available to avoid possible printing delays. You do not need to replace the ink cartridges
until print quality becomes unacceptable.
For more information about ordering ink cartridges for the device, see
Order printing
supplies online
.
To replace the ink cartridges
1. Make sure the product is turned on.
CAUTION: If the product is turned off when you open the front access door to
access the ink cartridges, the product cannot release the cartridges for changing.
You might damage the product if the ink cartridges are not docked safely when
you try to remove them.
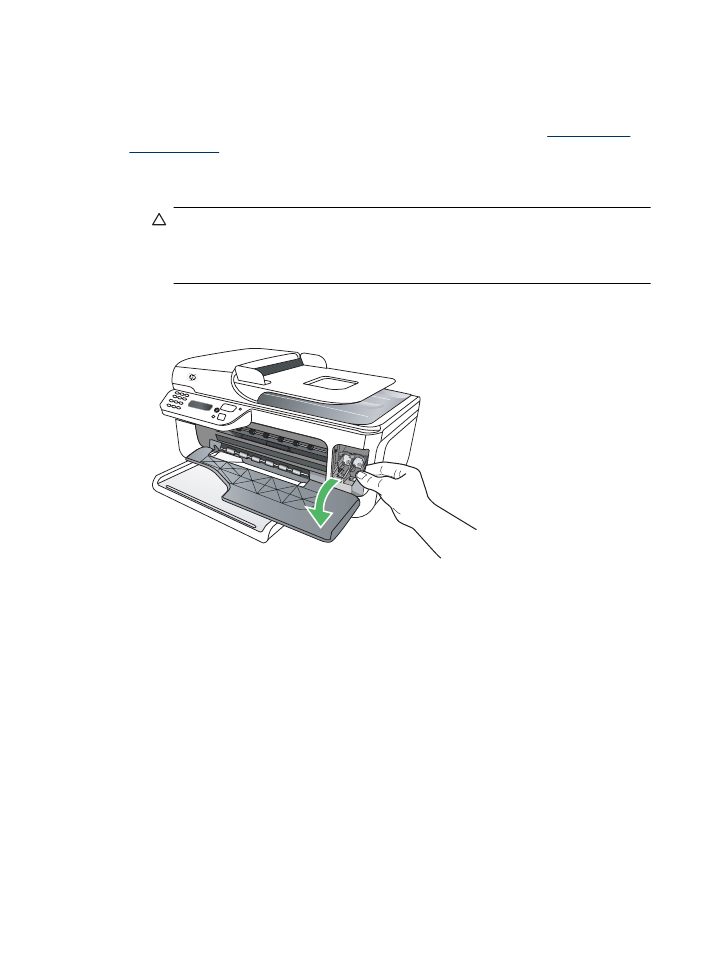
2. Open the front access door.
The print carriage moves to the far right side of the product.
3. Wait until the print carriage is idle and silent, and then lightly press down on an ink
cartridge to release it.
If you are replacing the tri-color ink cartridge, remove the ink cartridge from the slot
on the left.
Replace the ink cartridges
63
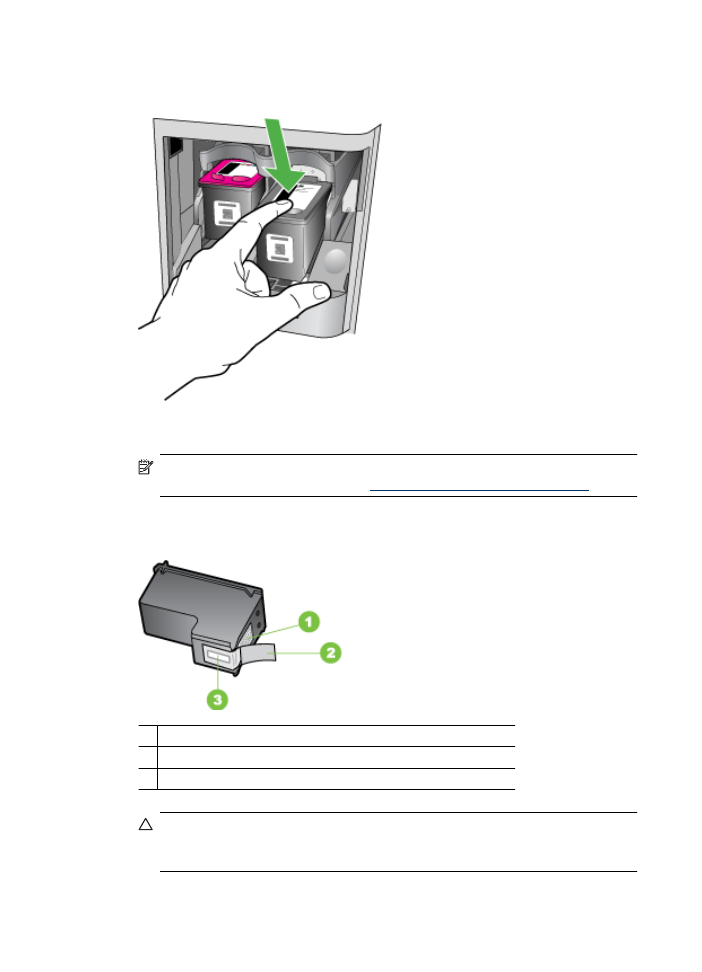
If you are replacing the black ink cartridge, remove the ink cartridge from the slot on
the right.
4. Pull the ink cartridge toward you, out of its slot.
NOTE: HP provides recycling options for used ink cartridges in many countries/
regions. For more information, see
HP inkjet supplies recycling program
.
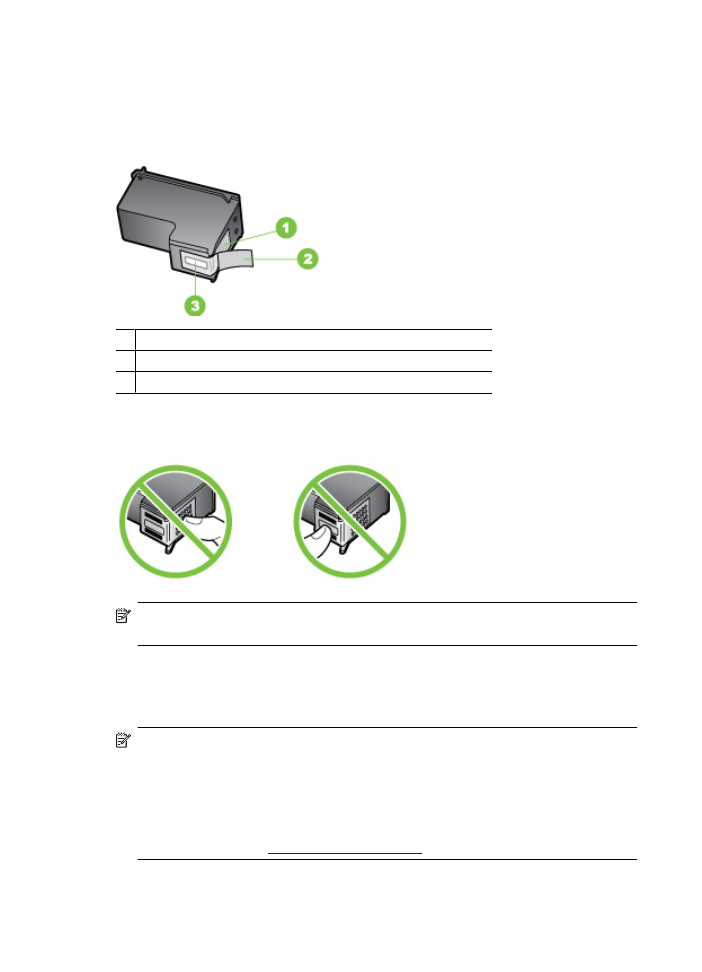
5. Remove the new ink cartridge from its packaging and, being careful to touch only the
black plastic, gently remove the plastic tape by using the pink pull tab.
1 Copper-colored contacts
2 Plastic tape with pink pull tab (must be removed before installing)
3 Ink nozzles under tape
CAUTION: Do not touch the copper-colored contacts or ink nozzles. Also, do
not re-tape the ink cartridges. Doing so can result in clogs, ink failure, and bad
electrical connections.
Chapter 6
64
Work with ink cartridges
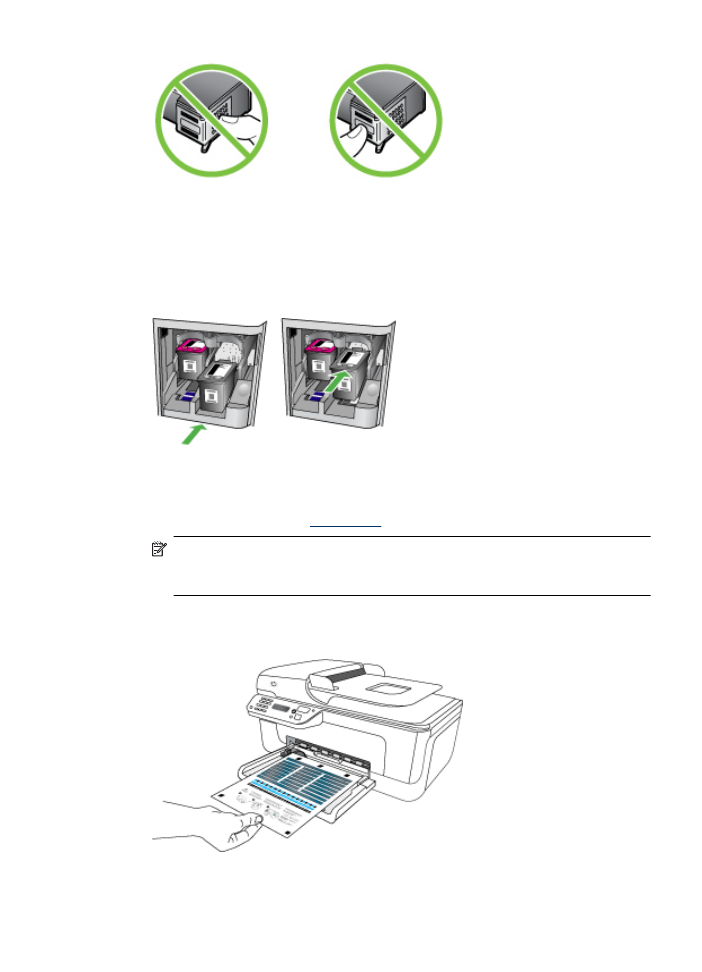
6. Hold the ink cartridge with the HP logo on top, and insert the new ink cartridge into
the empty cartridge slot. Make sure you push the ink cartridge in firmly until it snaps
into place.
If you are installing the tri-color ink cartridge, slide it into the left slot.
If you are installing a black ink cartridge, slide it into the right slot.
7. Close the front access door.
8. Make sure you have letter or A4, unused, plain white paper loaded in the input tray.
For more information, see
Load media
.
NOTE: If you have colored paper loaded in the input tray when you align the ink
cartridges, the alignment will fail. Load unused plain white paper into the input
tray, and then try the alignment again.
9. Press OK
The HP All-in-One prints an ink cartridge alignment sheet.
Replace the ink cartridges
65

10. Load the ink cartridge alignment sheet face down on the scanner glass in the front
right corner with the top of the page to the right, and then press OK. For more
information, see
Load an original on the scanner glass
.
The HP All-in-One aligns the ink cartridges. Recycle or discard the ink cartridge
alignment sheet.