Solution 1: Install the ink cartridges correctly
Make sure all of the ink cartridges are properly installed:
1. Make sure the product is turned on.
CAUTION: If the product is turned off when you open the front access door to access the
ink cartridges, the product cannot release the cartridges for changing. You might damage
the product if the ink cartridges are not docked safely when you try to remove them.
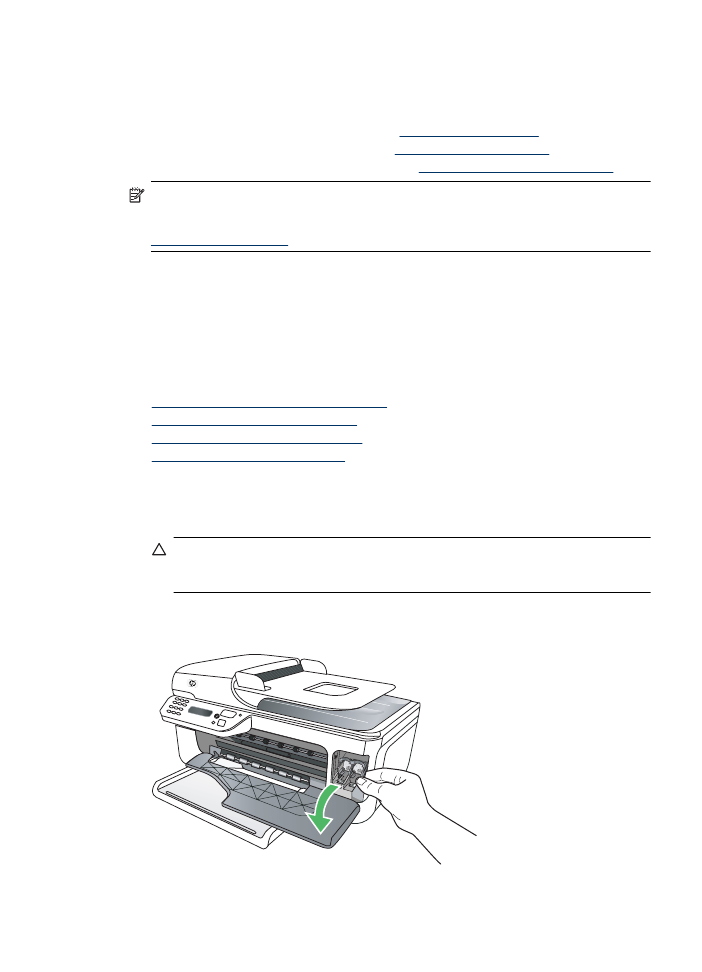
2. Open the front access door.
The print carriage moves to the far right side of the product.
Cartridge Problem
211

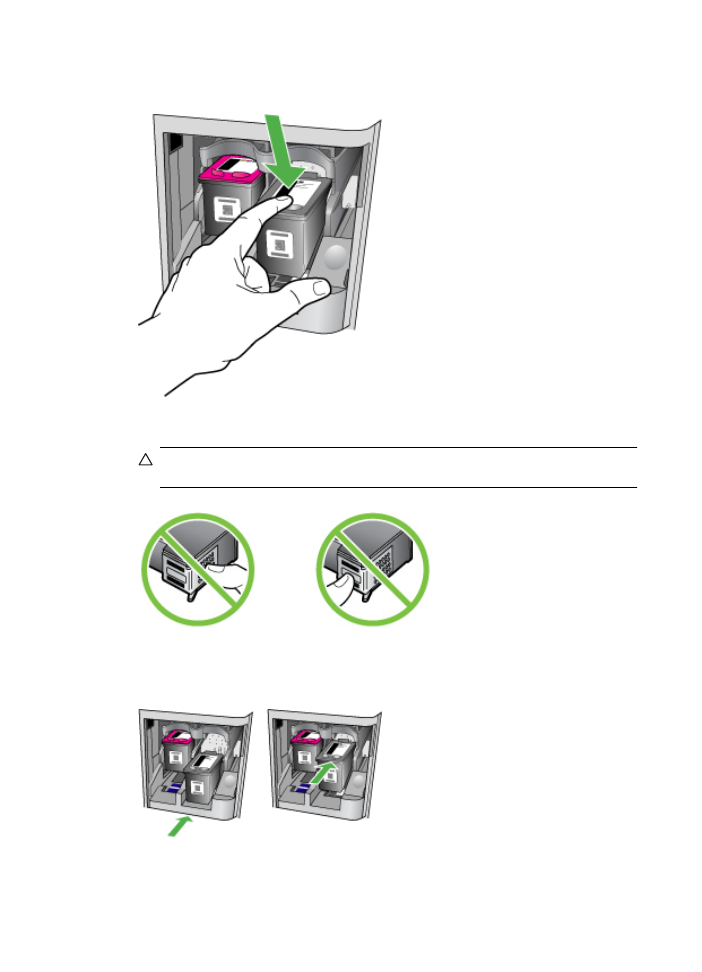
3. Wait until the print carriage is idle and silent, and then lightly press down on the ink cartridge to
release it.
4. Pull the ink cartridge toward you, out of its slot.
CAUTION: Do not touch the copper-colored contacts or ink nozzles. Doing so can result
in clogs, ink failure, and bad electrical connections.
5. Hold the ink cartridge with the HP logo on top, and reinsert the ink cartridge. Make sure you
push the ink cartridge in firmly until it snaps into place.
6. Close the front access door and check if the error message has gone away.
If the problem persists, try the next solution.
Appendix F
212
Errors (Windows)